> ## Documentation Index
> Fetch the complete documentation index at: https://docs.teio.me/llms.txt
> Use this file to discover all available pages before exploring further.
# Codex CLI
> Codex 是 OpenAI 官方的命令行 AI 编程工具
## 前置条件
* 已 [创建 API 密钥](/create-token)
* 如果通过 NPM 安装,需要已安装 Node.js 22+
## 安装 Codex
官方一键安装(推荐):
```bash theme={null}
curl -fsSL https://openai.com/codex/install.sh | sh
```
或通过 Homebrew:
```bash theme={null}
brew install codex
```
或通过 NPM:
```bash theme={null}
npm install -g @openai/codex
```
```bash theme={null}
npm install -g @openai/codex
```
## 配置
通过 Teio 站点一键导入,无需手动复制 Key 和地址。需要先安装 [CC Switch](/cc-switch)。
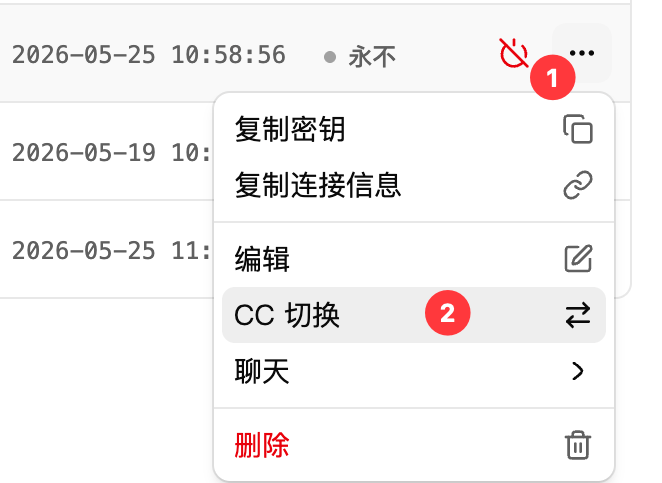
1. 打开 Teio **密钥**页面,点击密钥右侧下拉按钮,选择 **"CC 切换"**
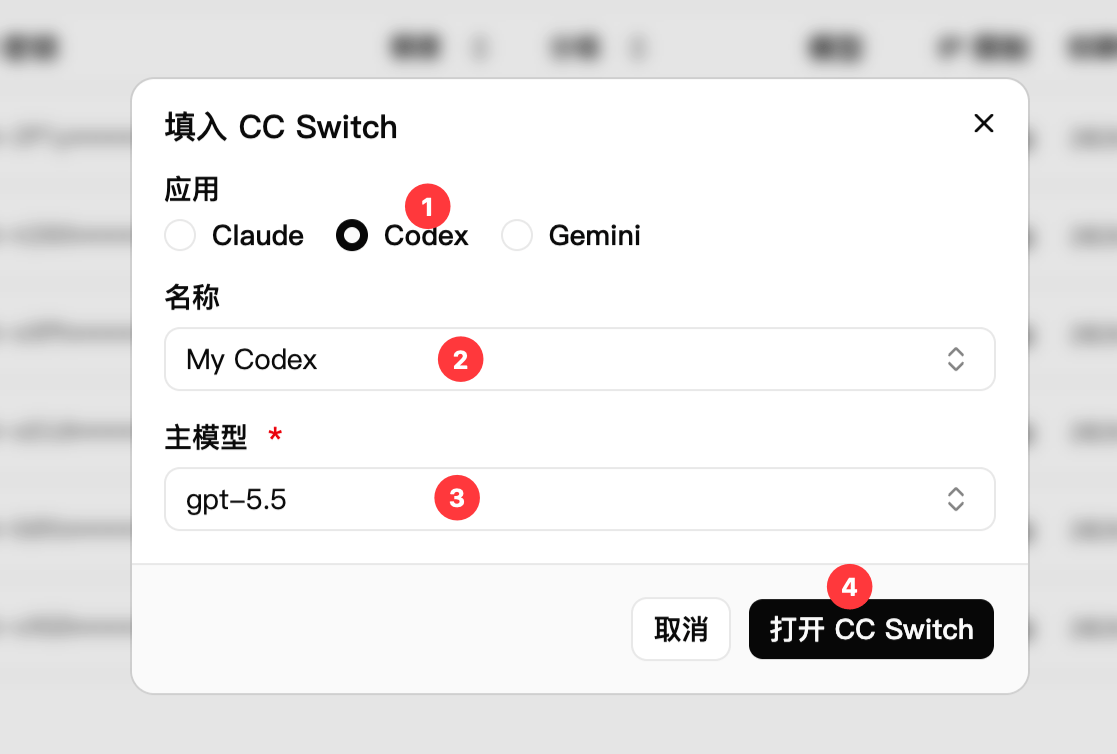
 2. CC Switch 自动打开导入面板,补充供应商名称并选择模型
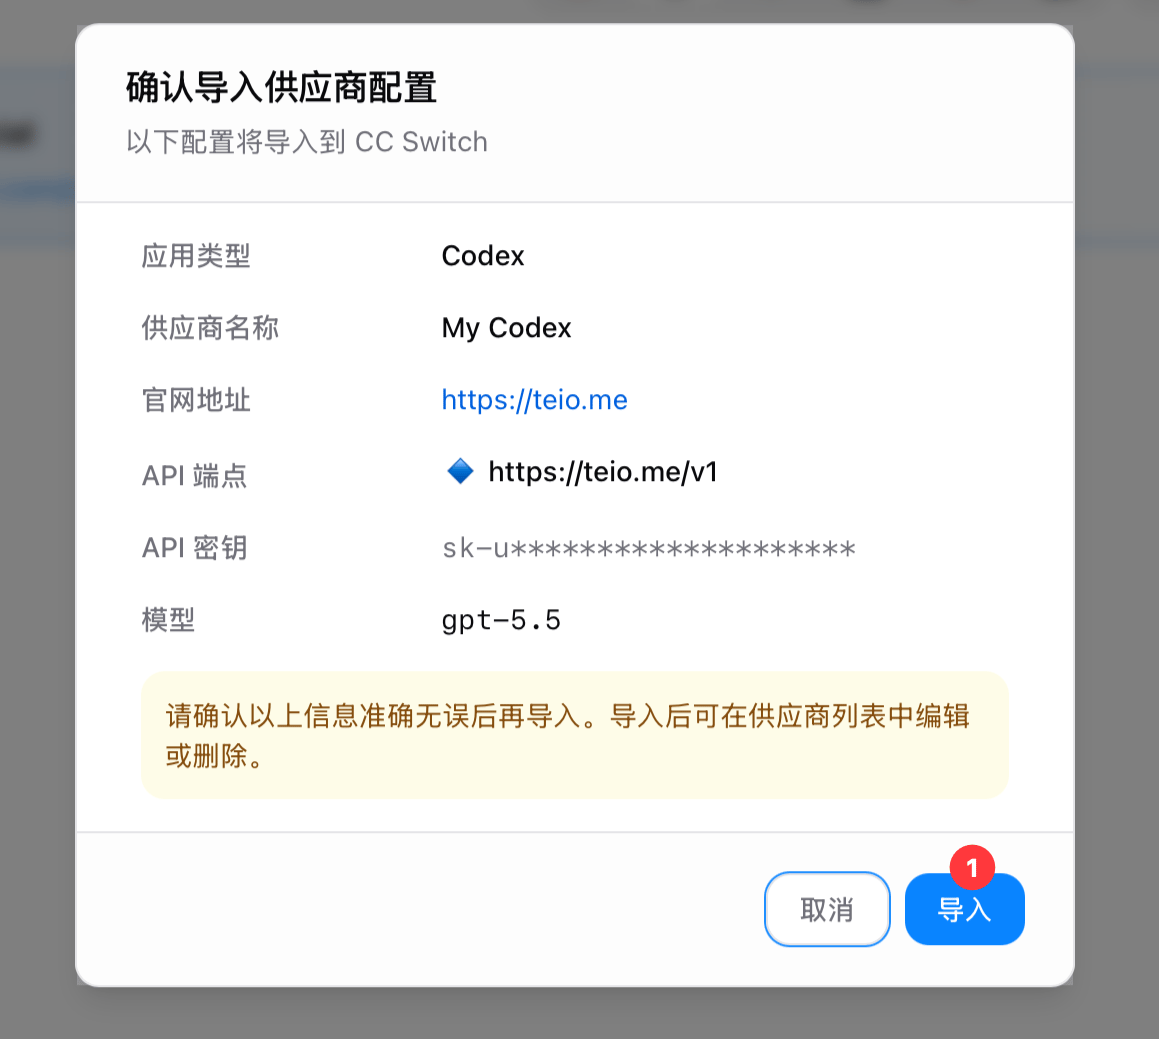
 3. 点击"导入"完成
 创建 `~/.codex/config.toml` 和 `~/.codex/auth.json`(Windows 路径为 `C:\Users\<用户名>\.codex\`)。
```bash theme={null}
mkdir -p ~/.codex
```
`config.toml`:
```toml theme={null}
model_provider = "teio"
model = "gpt-5.5"
model_reasoning_effort = "medium"
disable_response_storage = true
[model_providers.teio]
name = "teio"
base_url = "https://teio.me/v1"
wire_api = "responses"
requires_openai_auth = true
web_search = "live"
```
`auth.json`:
```json theme={null}
{
"OPENAI_API_KEY": "你的密钥"
}
```
## 启动
如果你刚完成上述配置,请先重启终端,确保配置文件已被加载。
```bash theme={null}
codex
```
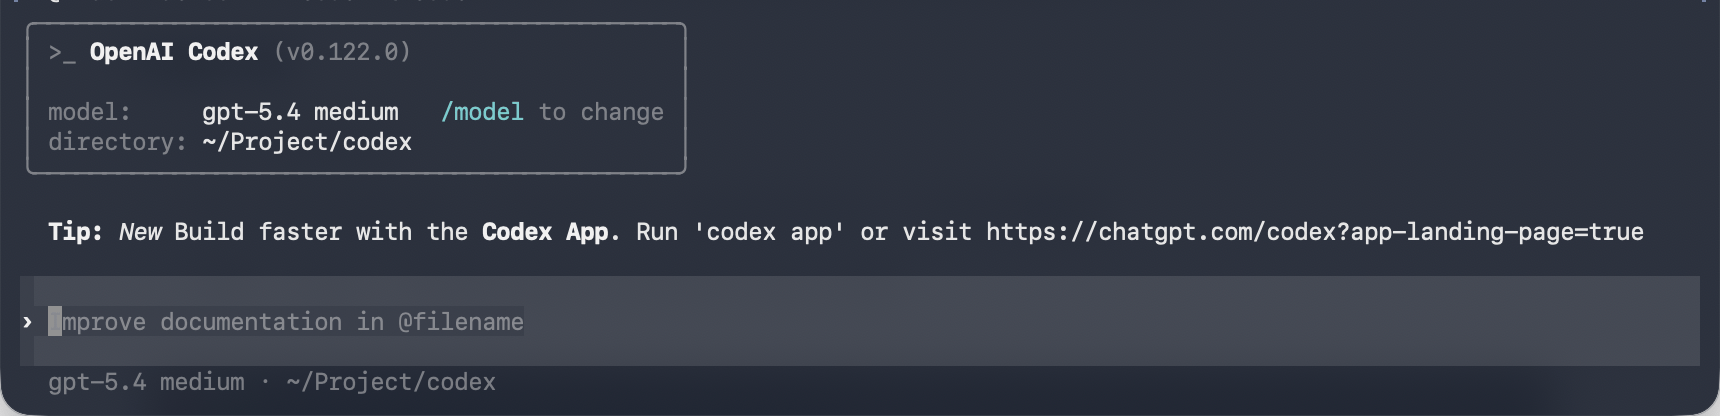
如果配置正确,你会进入 Codex 的交互界面。
创建 `~/.codex/config.toml` 和 `~/.codex/auth.json`(Windows 路径为 `C:\Users\<用户名>\.codex\`)。
```bash theme={null}
mkdir -p ~/.codex
```
`config.toml`:
```toml theme={null}
model_provider = "teio"
model = "gpt-5.5"
model_reasoning_effort = "medium"
disable_response_storage = true
[model_providers.teio]
name = "teio"
base_url = "https://teio.me/v1"
wire_api = "responses"
requires_openai_auth = true
web_search = "live"
```
`auth.json`:
```json theme={null}
{
"OPENAI_API_KEY": "你的密钥"
}
```
## 启动
如果你刚完成上述配置,请先重启终端,确保配置文件已被加载。
```bash theme={null}
codex
```
如果配置正确,你会进入 Codex 的交互界面。
 遇到问题?请参考 [常见问题](/faq)。