> ## Documentation Index
> Fetch the complete documentation index at: https://docs.teio.me/llms.txt
> Use this file to discover all available pages before exploring further.

# Chatbox image

> Chatbox 是一款支持多种模型服务商的 AI 对话客户端，支持 Windows、Linux、Android、iPhone 和 iPad 等平台。本教程将介绍如何在 Chatbox 中配置 Teio。手机端的配置流程与桌面端基本一致，可参考以下步骤操作。

## 前置条件

开始配置前，请先准备好以下内容：

* 已 [创建 API 密钥](/create-token)
* 已创建分组

## 下载 Chatbox

前往 [Chatbox Releases](https://github.com/chatboxai/chatbox/releases) 页面，下载适合你设备的最新版本安装包。

<Tabs>
  <Tab title="macOS">
    请根据设备芯片类型选择对应的 macOS 安装包：

    * Apple 芯片设备选择名称中包含 `arm64` 或 `aarch64` 的安装包
    * Intel 芯片设备选择名称中包含 `x64` 的安装包

    <Frame>
      <img src="https://mintcdn.com/cdhyzxwl/hcLStMAFGp5TYAUg/images/Screenshot-2026-08-05-at-11-53-29.png?fit=max&auto=format&n=hcLStMAFGp5TYAUg&q=85&s=78efef4961ffa609c977aaa9b77cd483" alt="Screenshot 2026 08 05 At 11 53 29" width="865" height="137" data-path="images/Screenshot-2026-08-05-at-11-53-29.png" />
    </Frame>

    下载完成后，打开 `.dmg` 文件，并将 Chatbox 拖入 `Applications` 文件夹完成安装。
  </Tab>

  <Tab title="Windows">
    下载适用于 Windows 的安装包：

    * 大多数 64 位 Windows 设备选择名称中包含 `x64` 的安装包

    <Frame>
      <img src="https://mintcdn.com/cdhyzxwl/hcLStMAFGp5TYAUg/images/Screenshot-2026-08-05-at-11-53-41.png?fit=max&auto=format&n=hcLStMAFGp5TYAUg&q=85&s=6b0e8691911ba4af1d6a4cb75df7d78f" alt="Screenshot 2026 08 05 At 11 53 41" width="788" height="80" data-path="images/Screenshot-2026-08-05-at-11-53-41.png" />
    </Frame>

    打开下载的安装程序，按照提示完成安装。
  </Tab>
</Tabs>

## 配置 Teio

Chatbox 支持通过 OpenAI Compatible 接口添加自定义模型服务商。具体配置步骤如下：

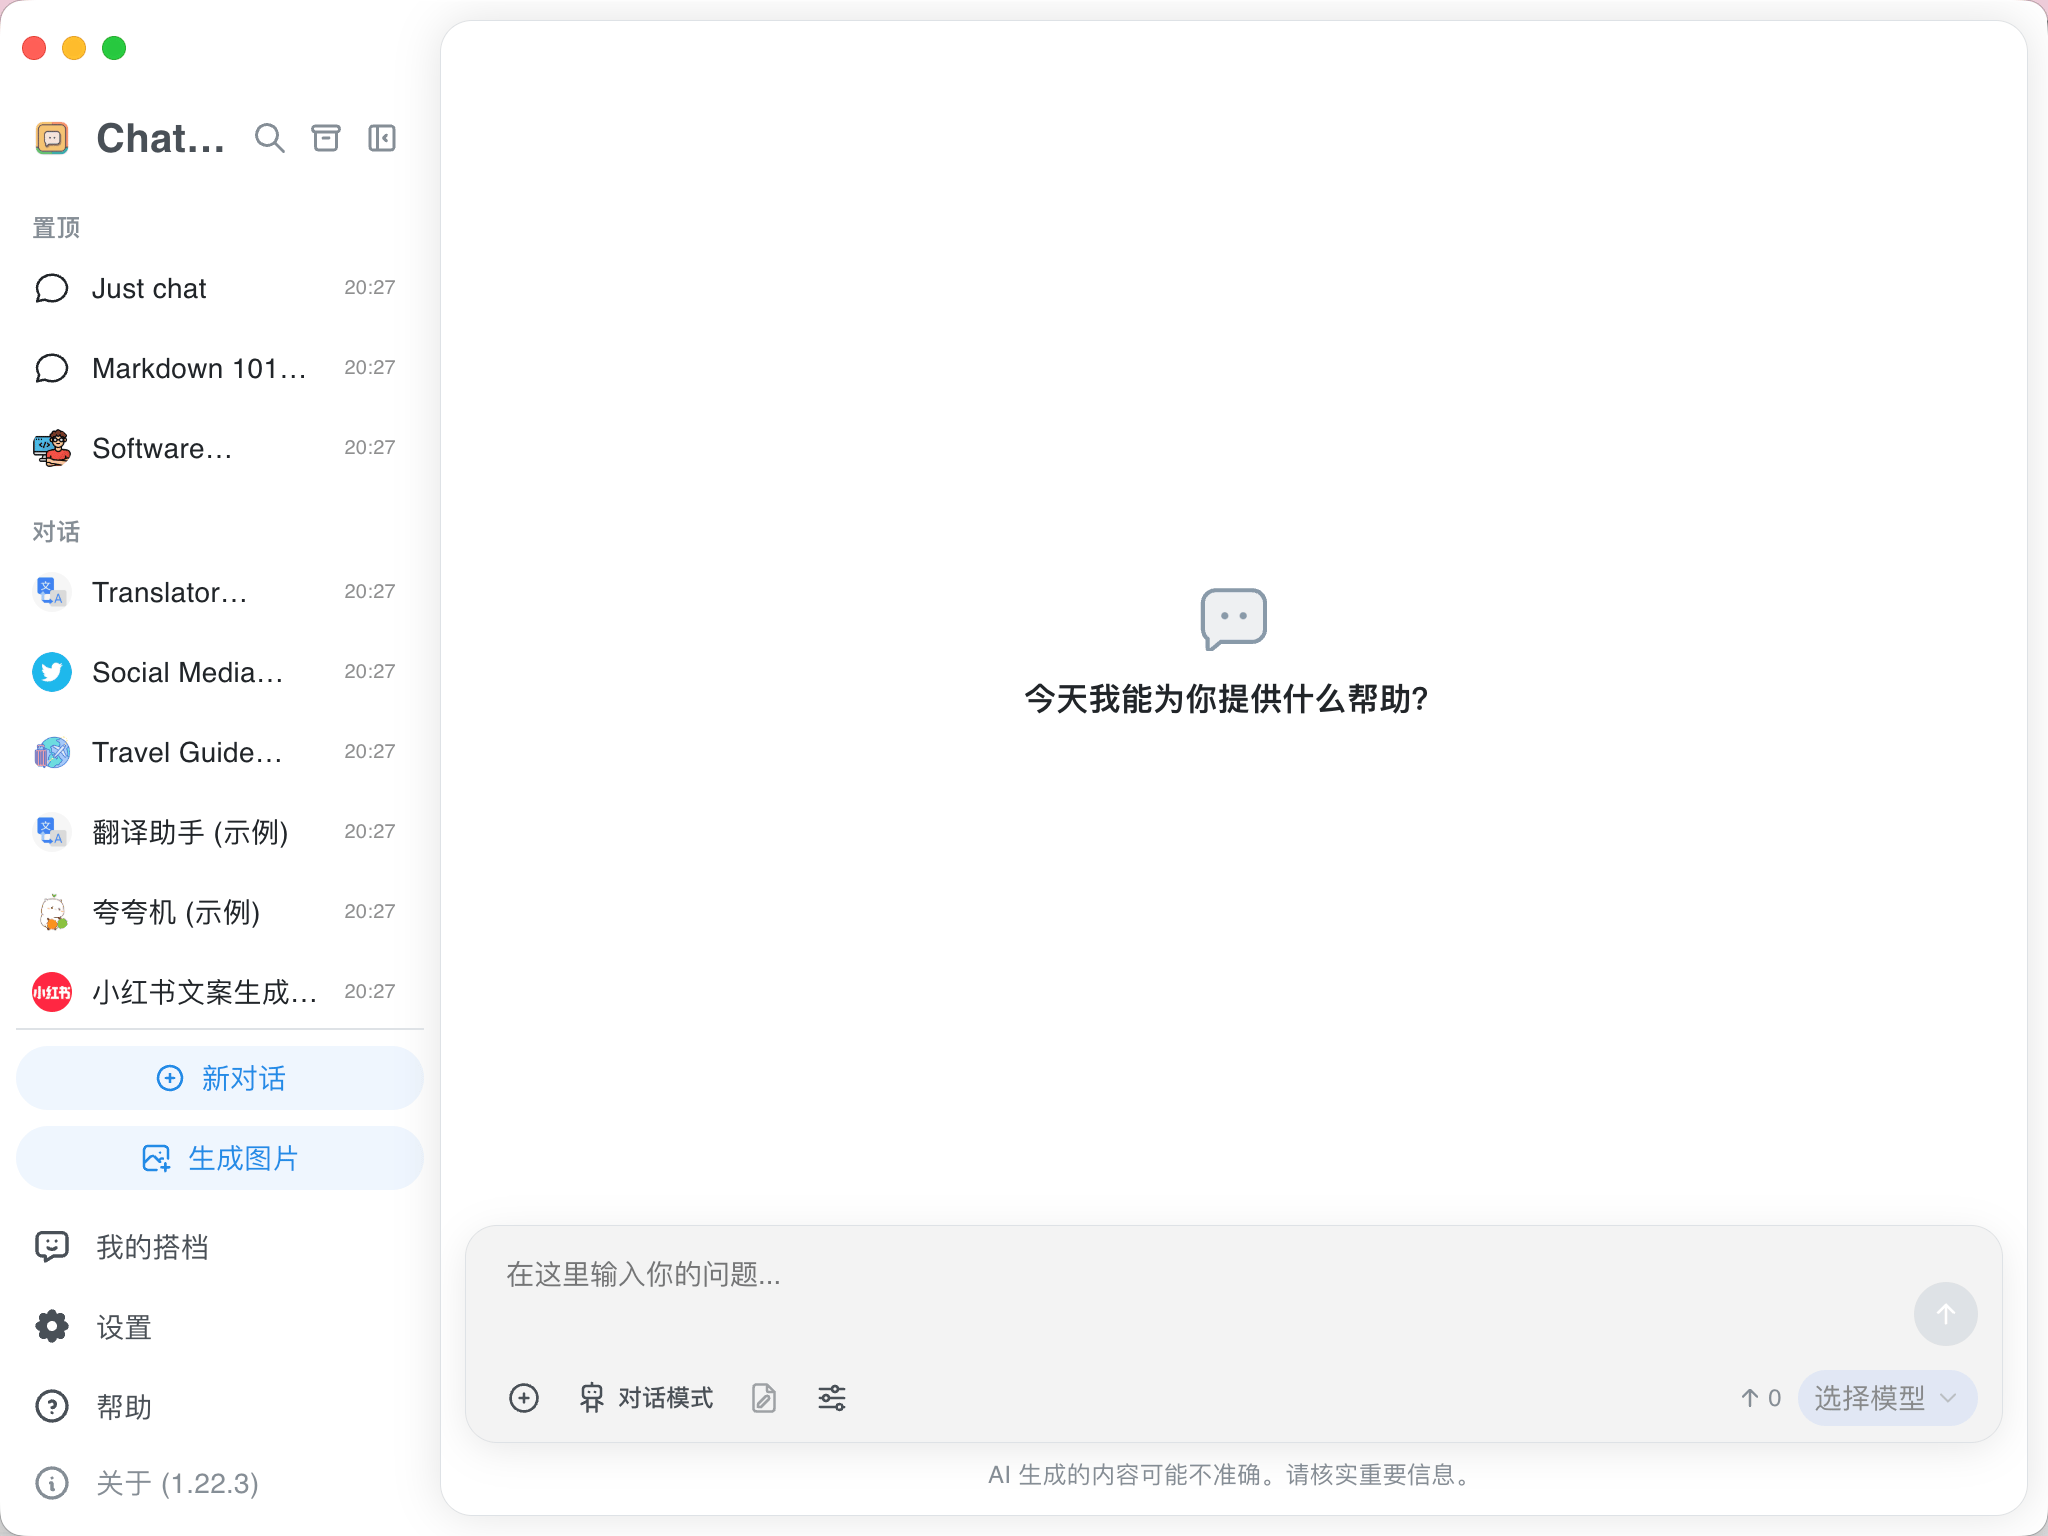
1. 打开 Chatbox，进入“设置”页面。
   <Frame>
     <img src="https://mintcdn.com/cdhyzxwl/1gnJvsU2TsZLdTQs/images/Screenshot-2026-08-15-at-21-14-35.png?fit=max&auto=format&n=1gnJvsU2TsZLdTQs&q=85&s=5d6f7f710b942006568725a68f06734b" alt="Screenshot 2026 08 15 At 21 14 35" width="2048" height="1536" data-path="images/Screenshot-2026-08-15-at-21-14-35.png" />
   </Frame>
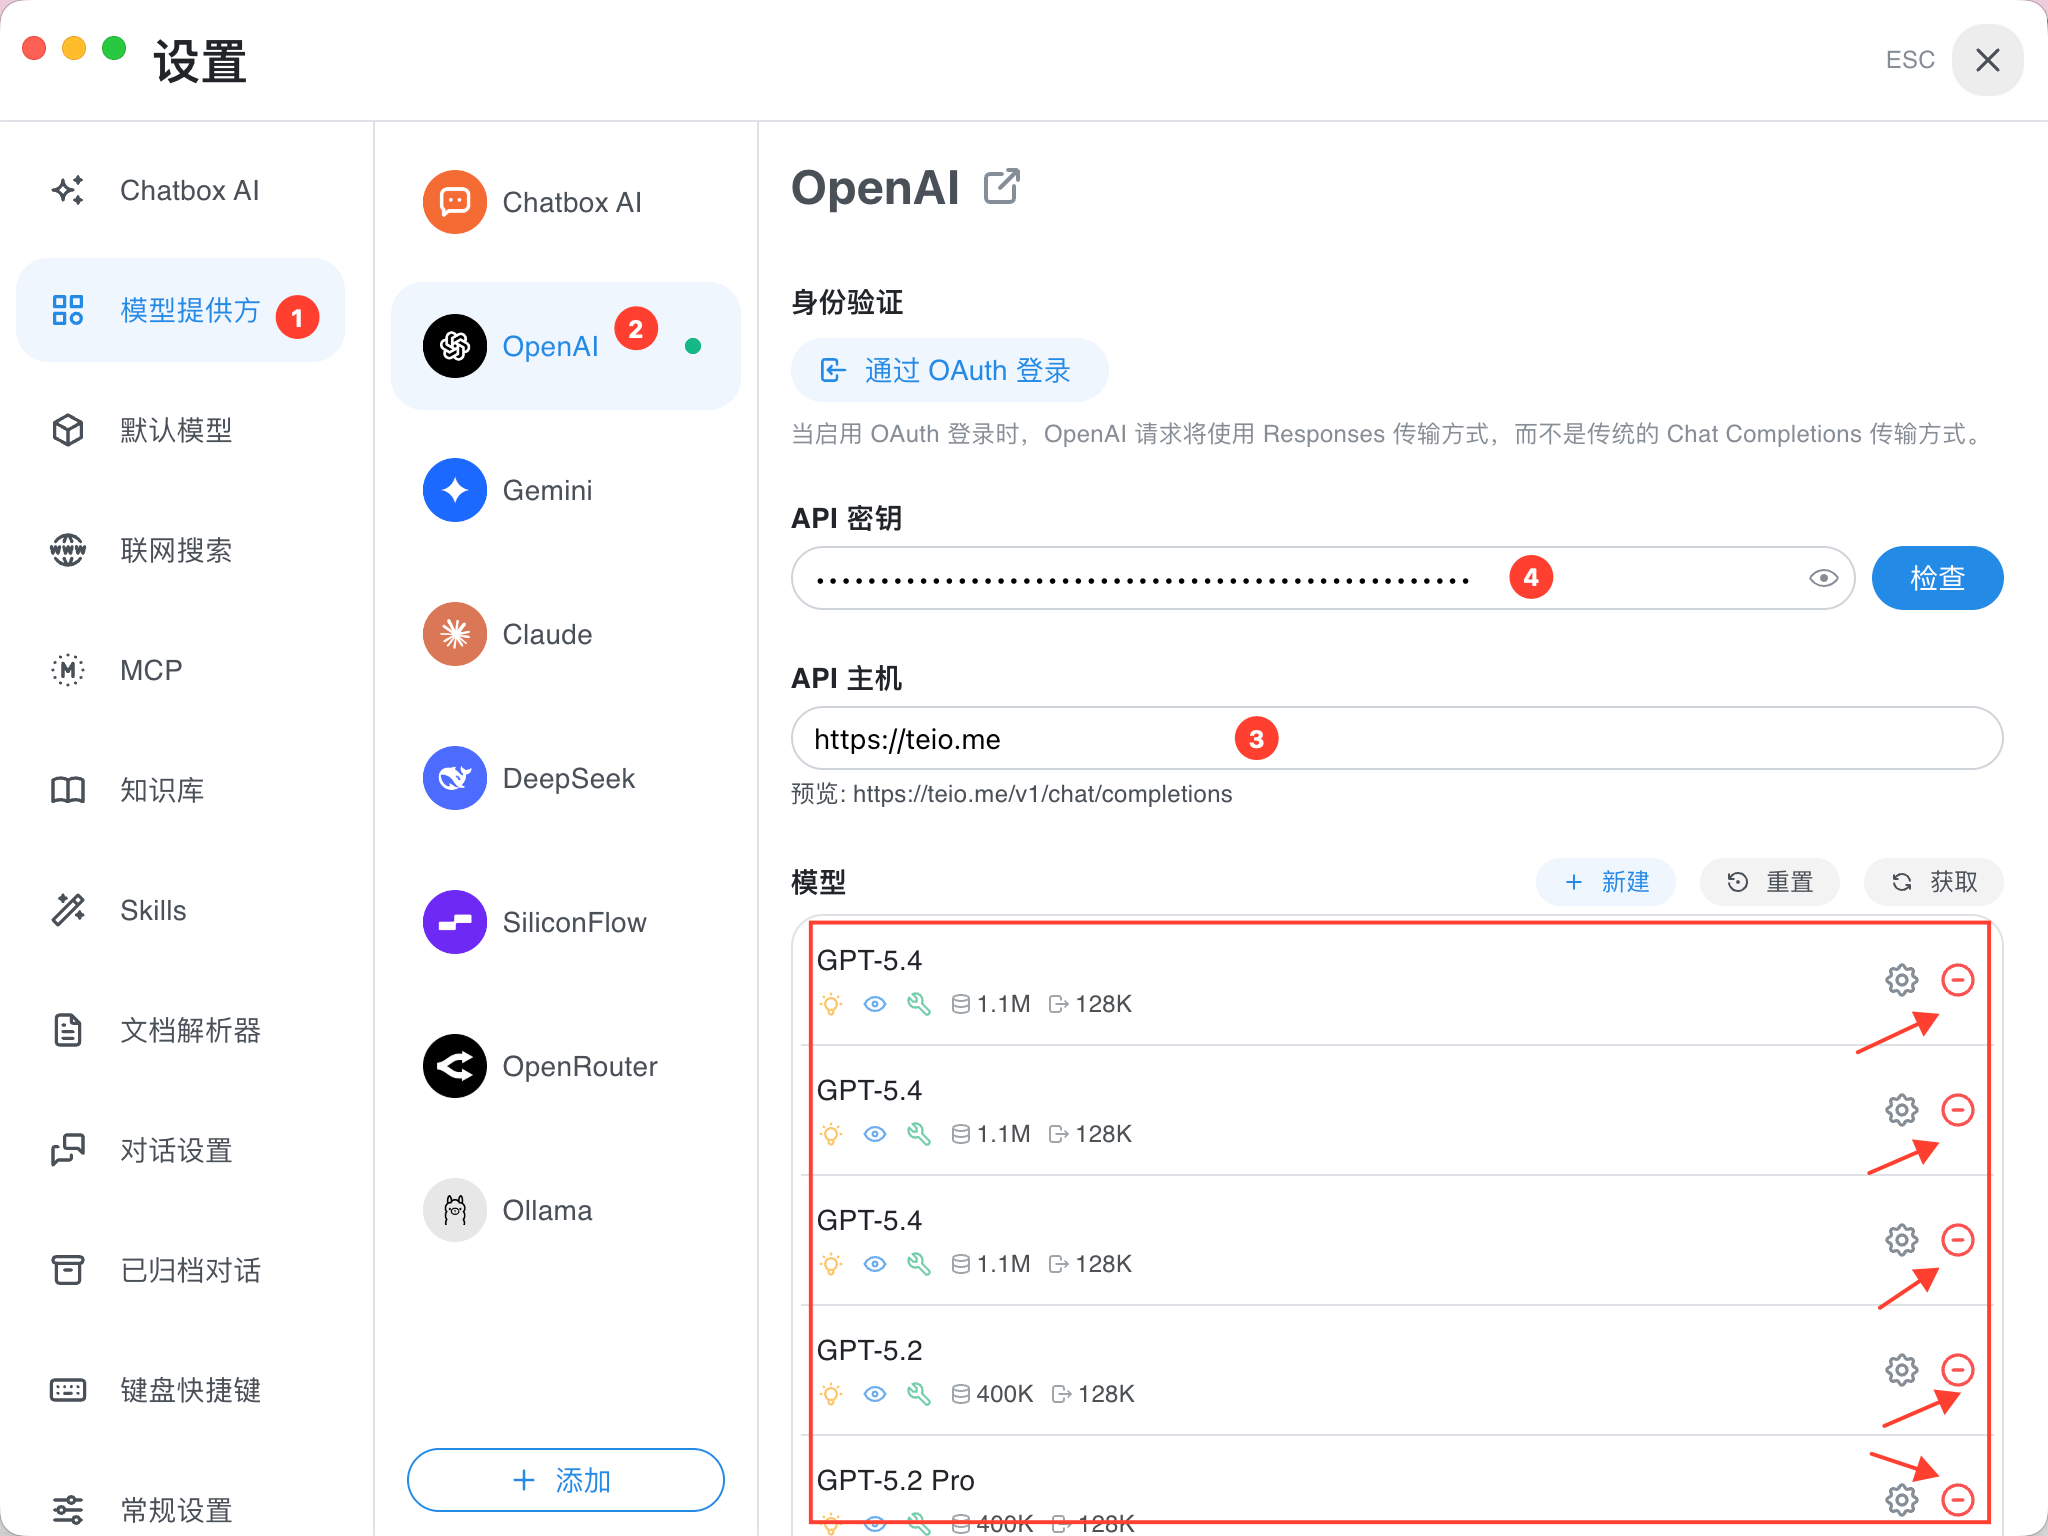
2. 在设置页面依次选择“模型提供方” > “OpenAI”。在“API 密钥”中填写你在 Teio 创建的密钥，“API 主机”填写 `https://teio.me`。然后删除原有模型，如下图所示。
   <Frame>
     <img src="https://mintcdn.com/cdhyzxwl/1gnJvsU2TsZLdTQs/images/Screenshot-2026-08-15-at-20-42-03.png?fit=max&auto=format&n=1gnJvsU2TsZLdTQs&q=85&s=0643e39886fac742eeb535301f4bfd85" alt="Screenshot 2026 08 15 At 20 42 03" width="2048" height="1536" data-path="images/Screenshot-2026-08-15-at-20-42-03.png" />
   </Frame>
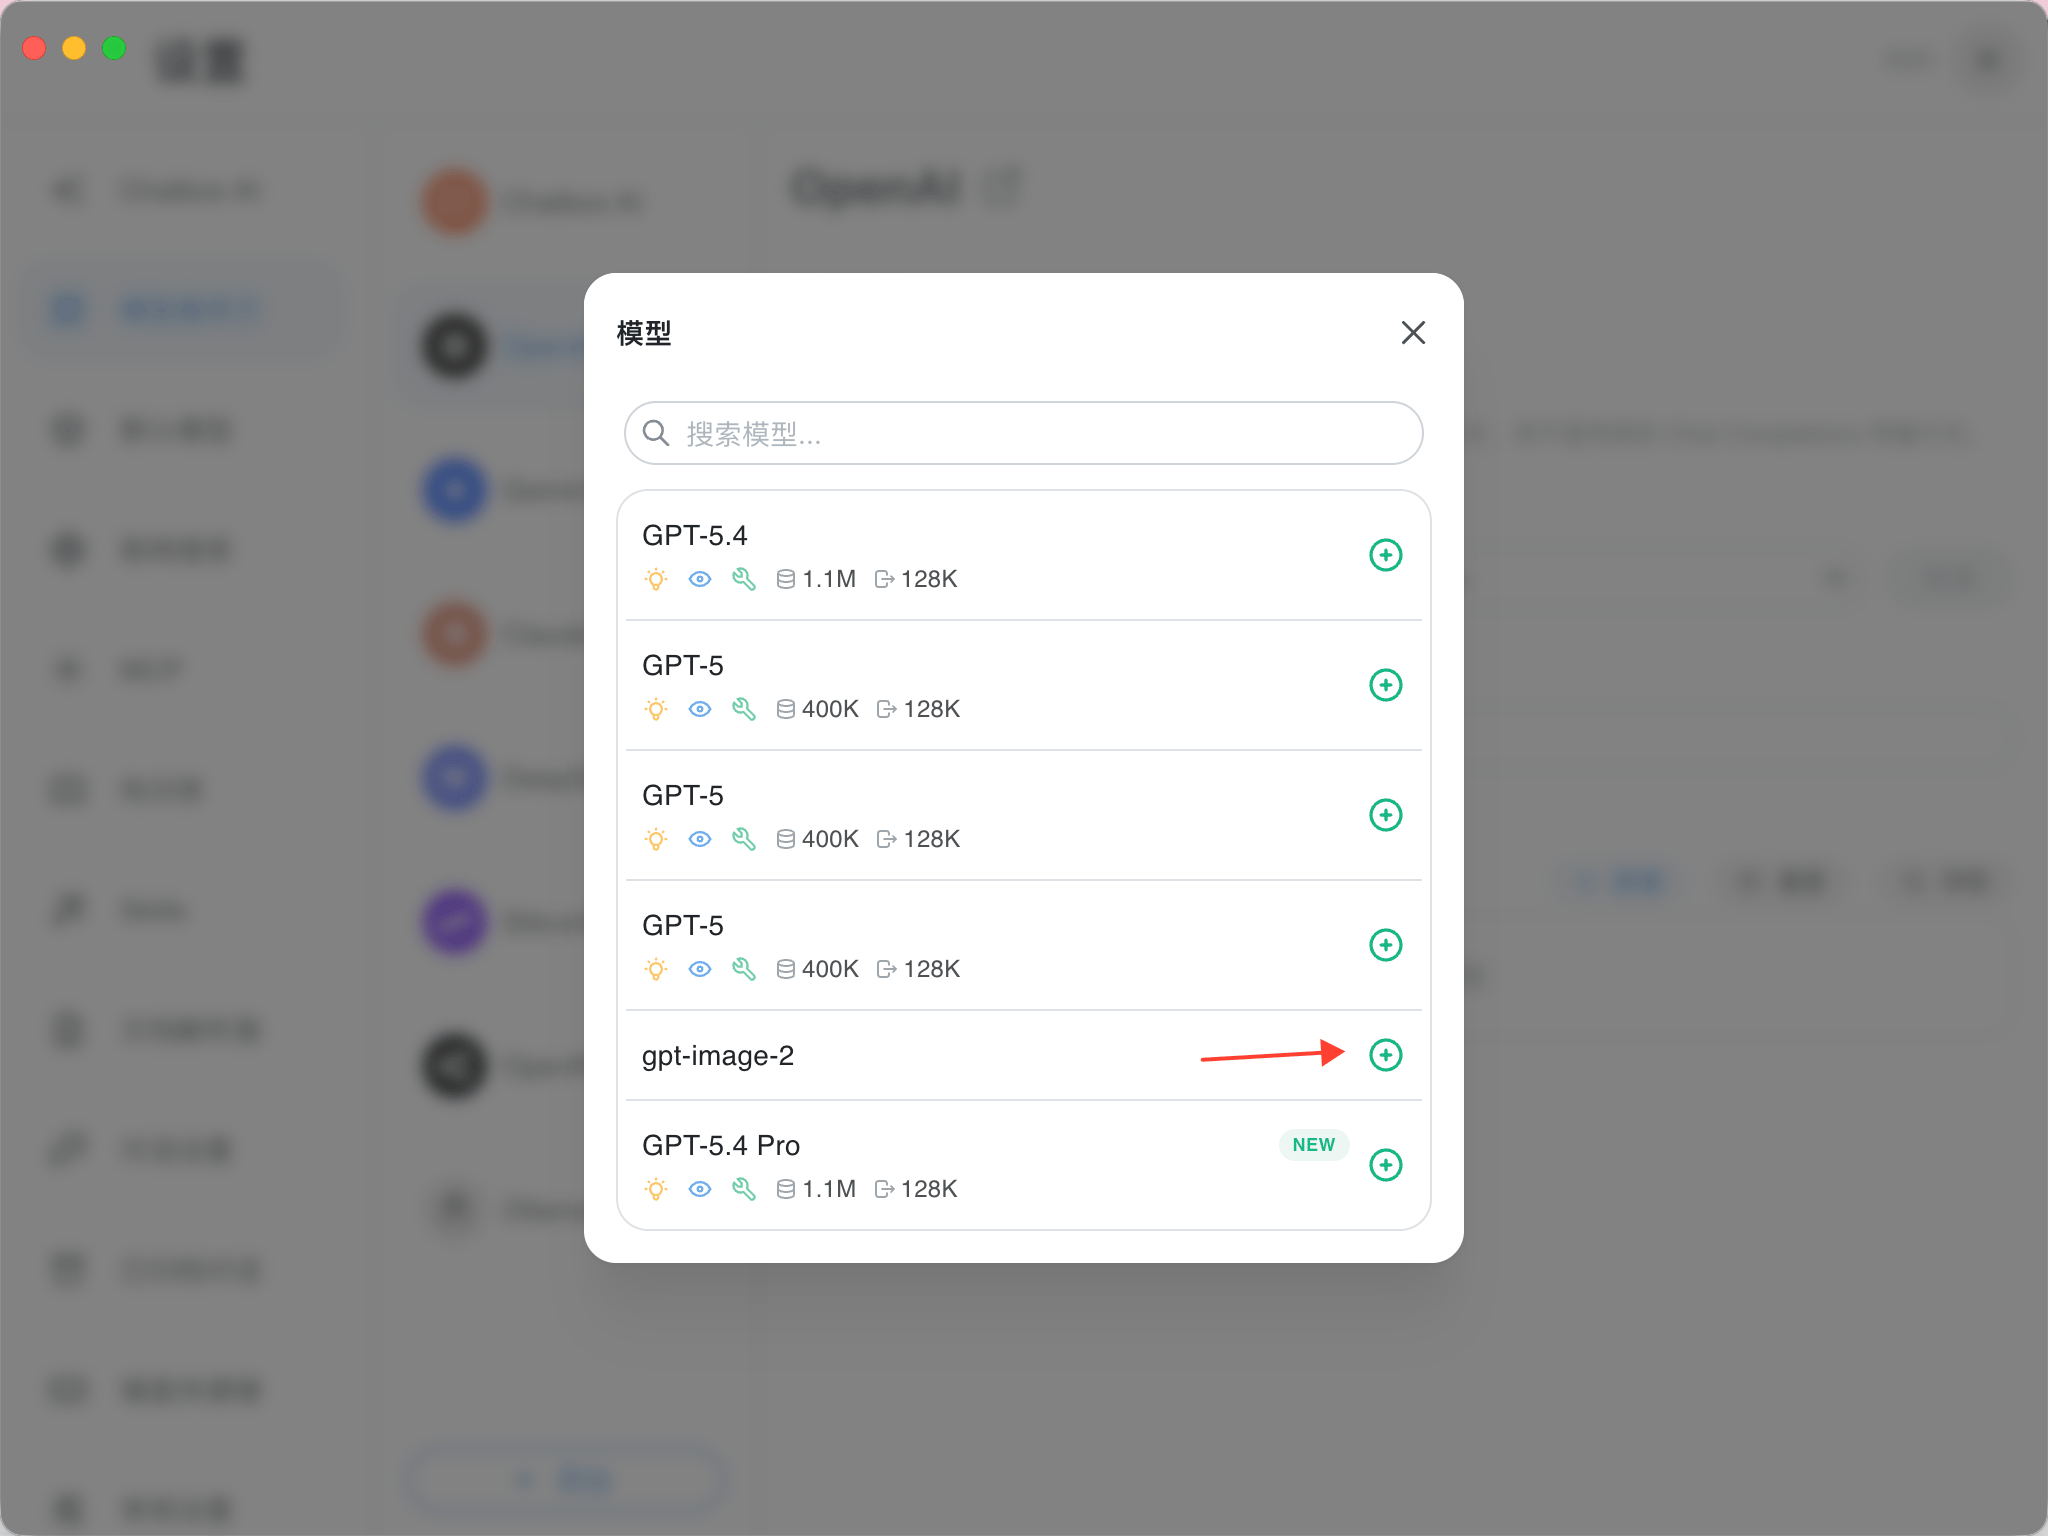
3. 接着，点击“获取模型”按钮，选择 `gpt-image-2` 模型并将其添加到模型列表。
   <Frame>
     <img src="https://mintcdn.com/cdhyzxwl/1gnJvsU2TsZLdTQs/images/Screenshot-2026-08-15-at-20-44-56.png?fit=max&auto=format&n=1gnJvsU2TsZLdTQs&q=85&s=9b779621aee8058c15c928a940f460e4" alt="Screenshot 2026 08 15 At 20 44 56" width="2048" height="1536" data-path="images/Screenshot-2026-08-15-at-20-44-56.png" />
   </Frame>
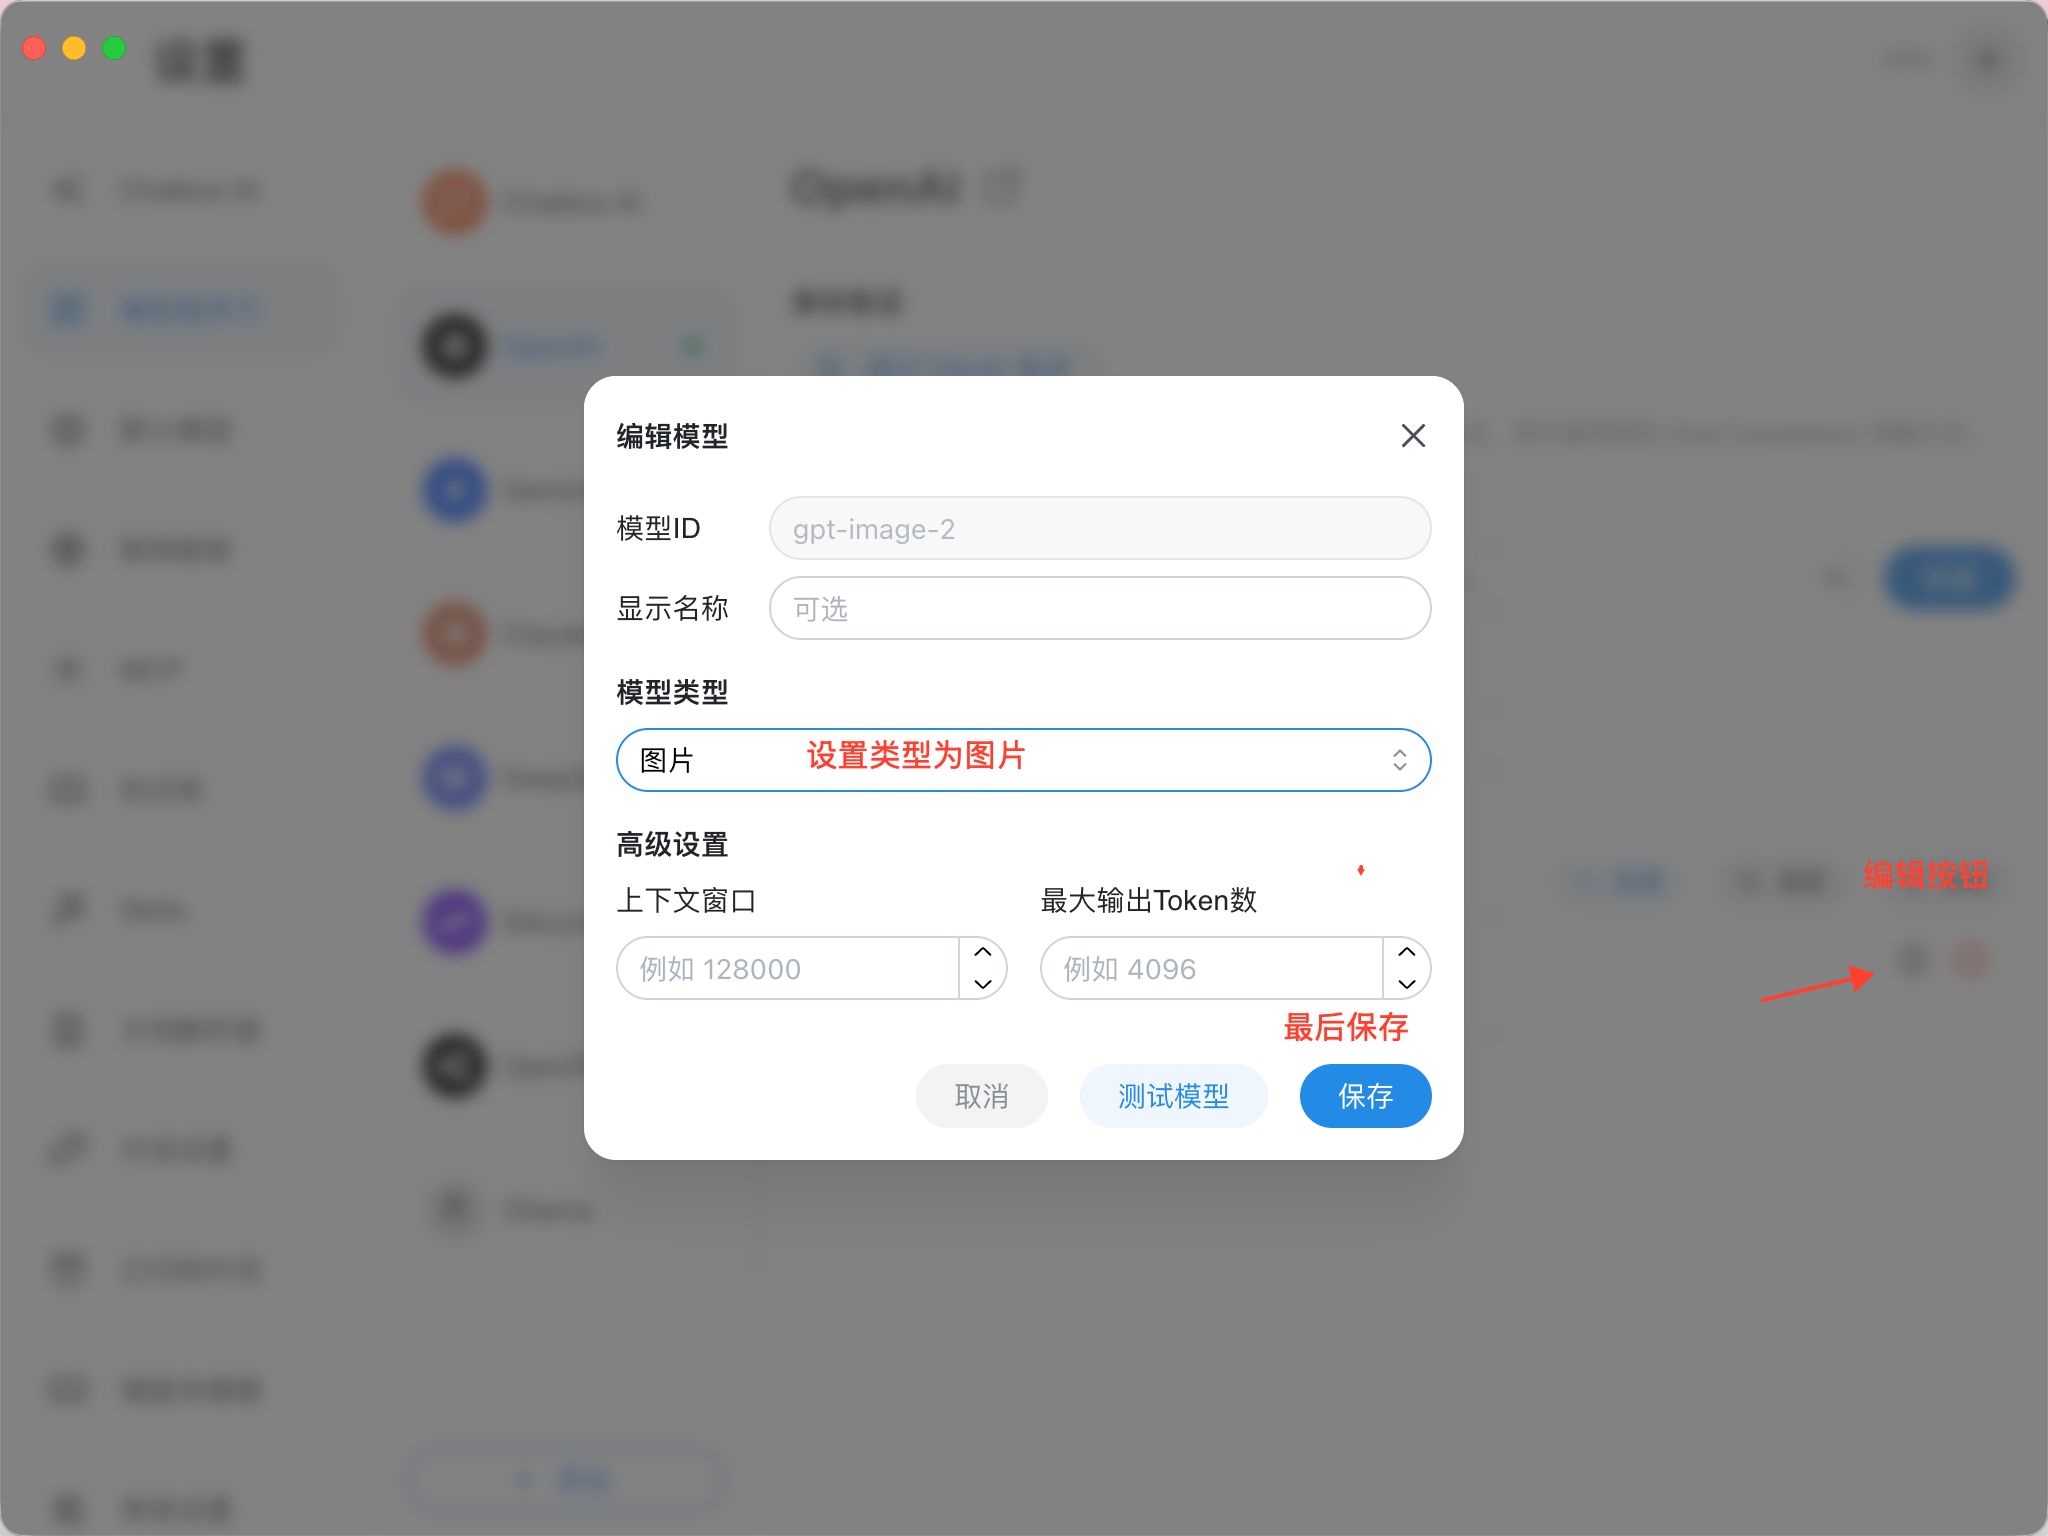
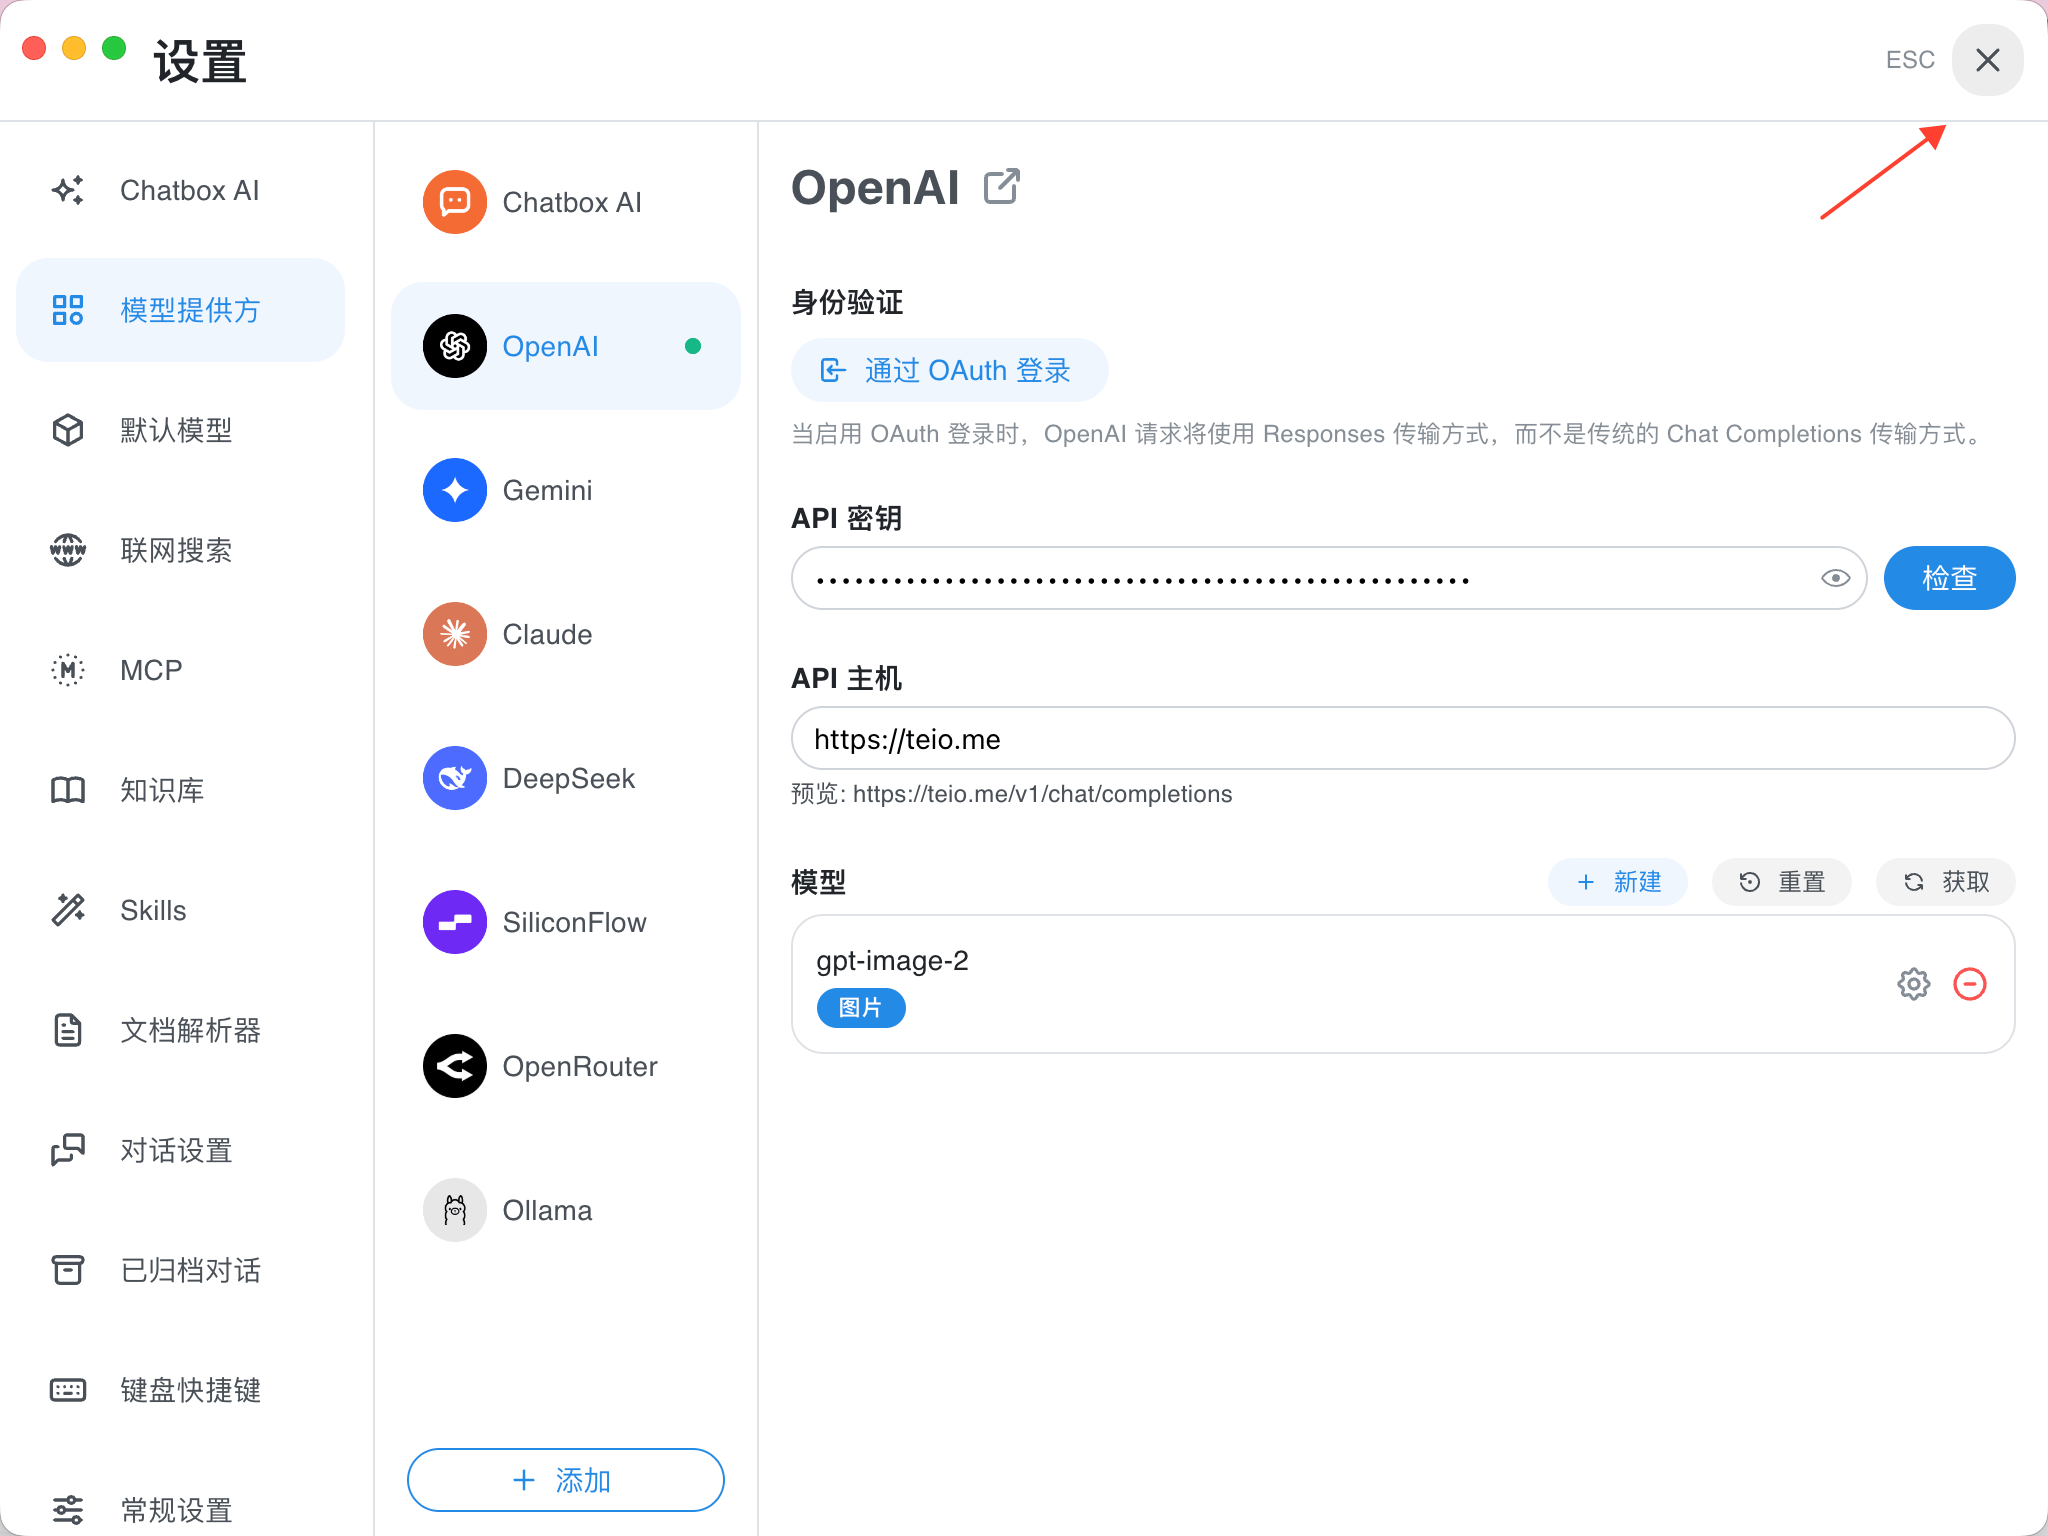
4. 点击模型旁边的“设置”按钮，将模型类型设置为“图片”，然后保存。
   <Frame>
     <img src="https://mintcdn.com/cdhyzxwl/1gnJvsU2TsZLdTQs/images/Screenshot-2026-08-15-at-20-46-31.png?fit=max&auto=format&n=1gnJvsU2TsZLdTQs&q=85&s=3145c318415d3abf0b0b8c938e5c97f0" alt="Screenshot 2026 08 15 At 20 46 31" width="2048" height="1536" data-path="images/Screenshot-2026-08-15-at-20-46-31.png" />
   </Frame>
5. 确认配置无误后，关闭设置页面。
   <Frame>
     <img src="https://mintcdn.com/cdhyzxwl/1gnJvsU2TsZLdTQs/images/Screenshot-2026-08-15-at-20-47-17.png?fit=max&auto=format&n=1gnJvsU2TsZLdTQs&q=85&s=9bd2d7a09e9bc18bc6177f6bcbf94679" alt="Screenshot 2026 08 15 At 20 47 17" width="2048" height="1536" data-path="images/Screenshot-2026-08-15-at-20-47-17.png" />
   </Frame>
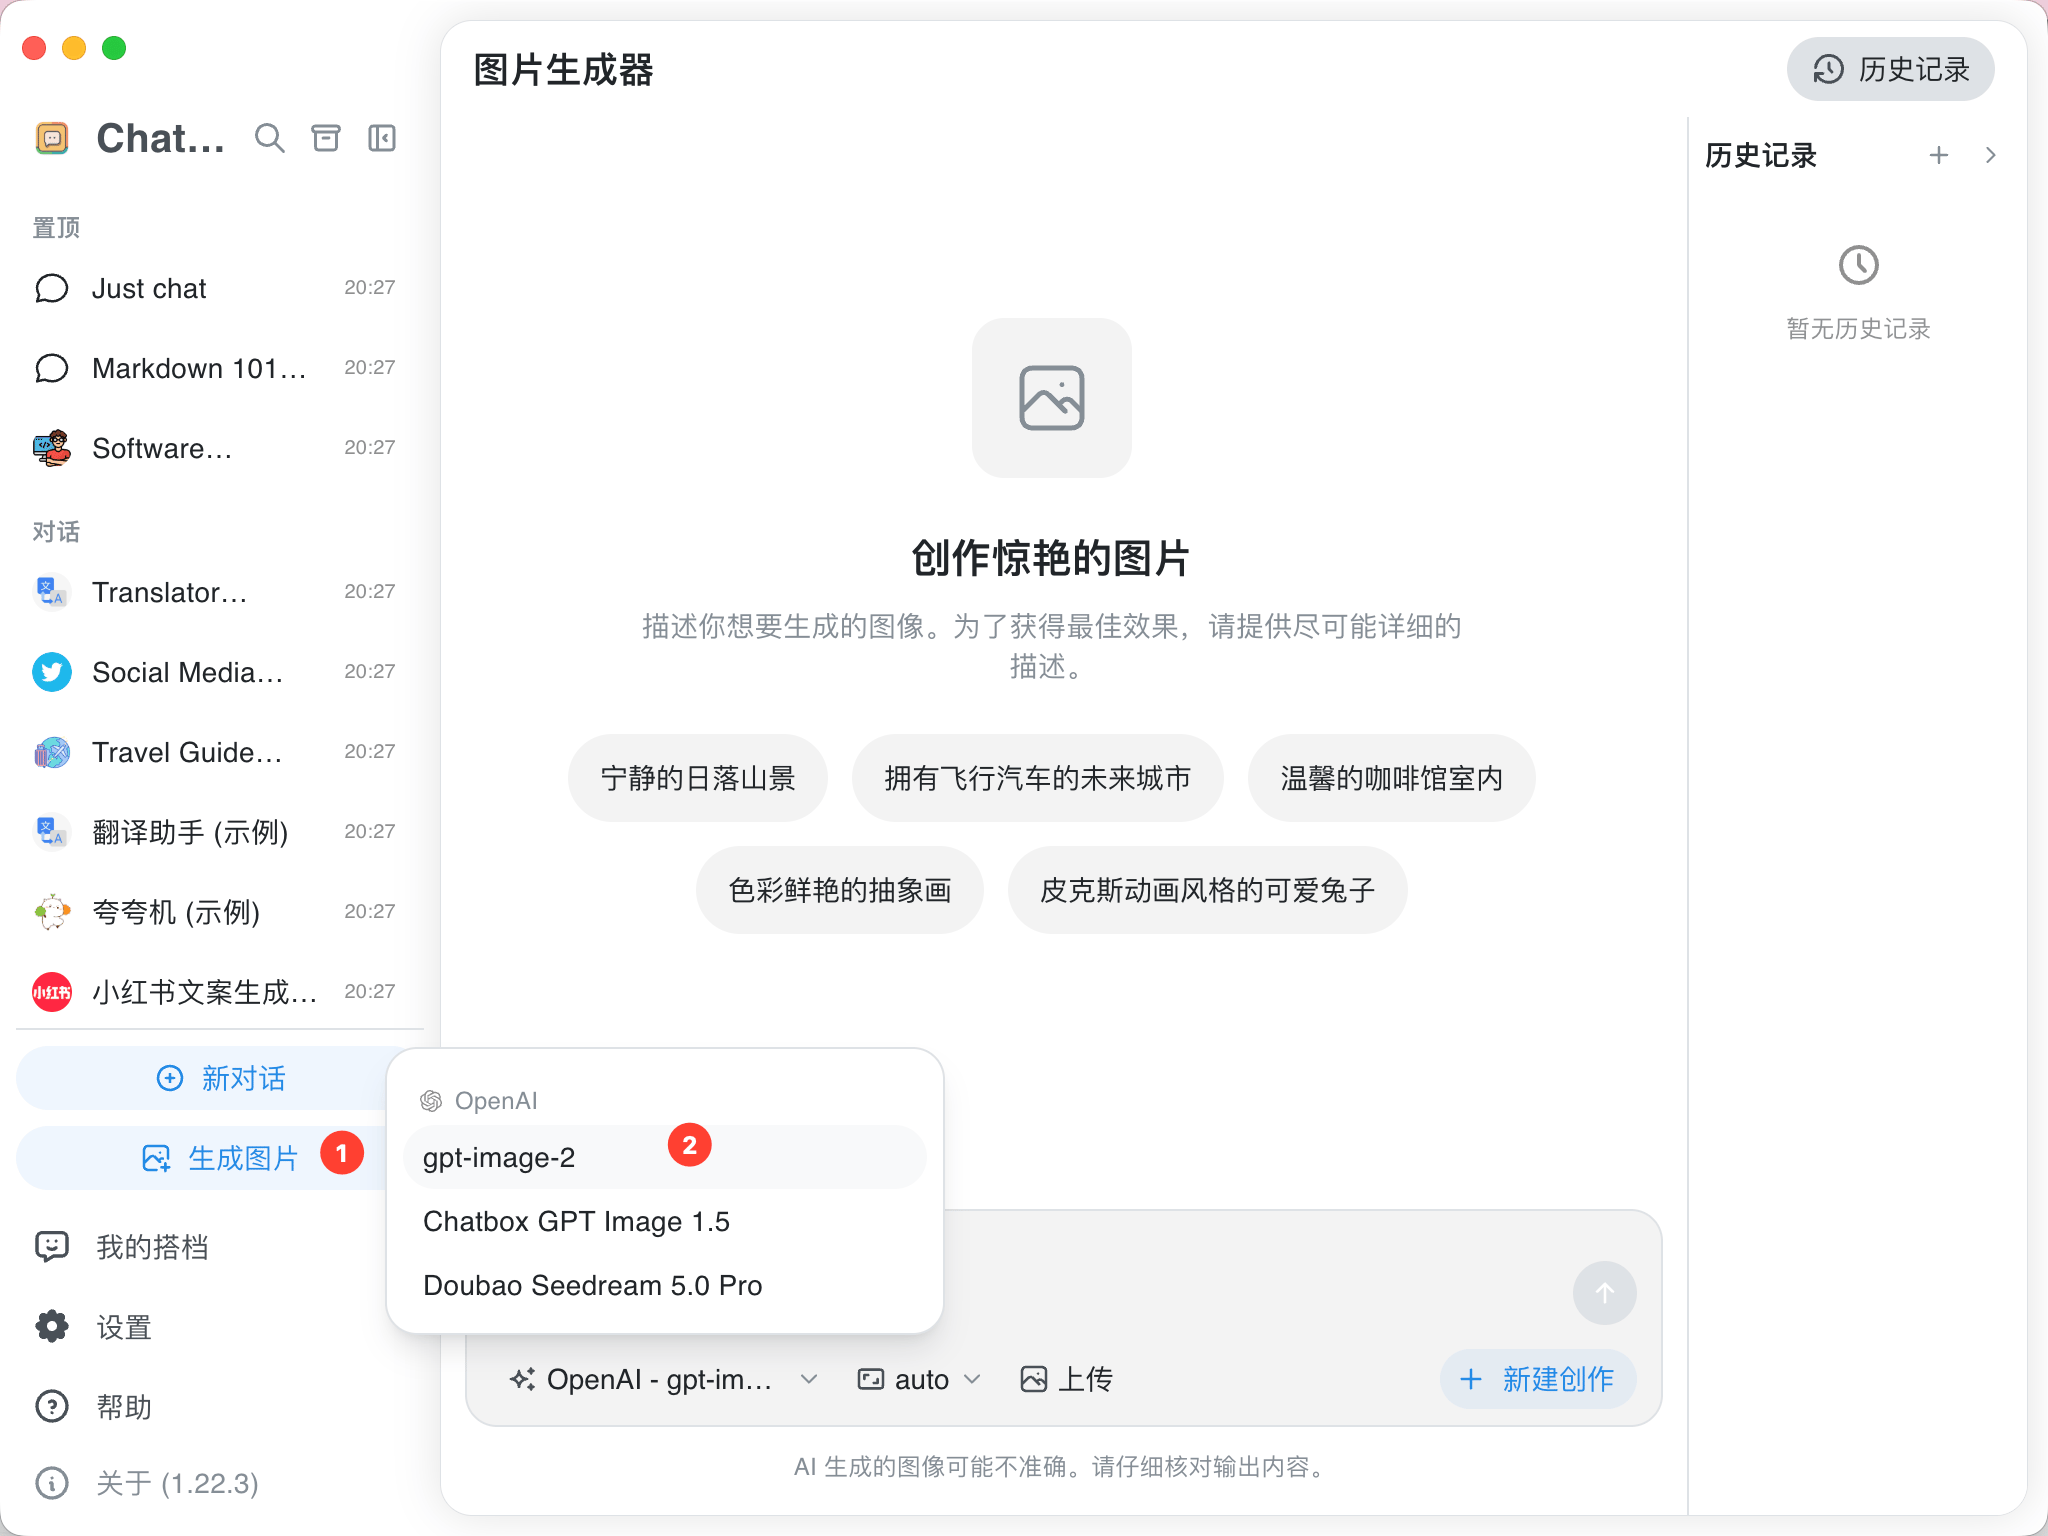
6. 返回聊天页面，切换到“生成图片”，并选择刚刚添加的模型。
   <Frame>
     <img src="https://mintcdn.com/cdhyzxwl/1gnJvsU2TsZLdTQs/images/Screenshot-2026-08-15-at-20-48-31.png?fit=max&auto=format&n=1gnJvsU2TsZLdTQs&q=85&s=03e83aed72ce90eaf99c02f171e176dd" alt="Screenshot 2026 08 15 At 20 48 31" width="2048" height="1536" data-path="images/Screenshot-2026-08-15-at-20-48-31.png" />
   </Frame>
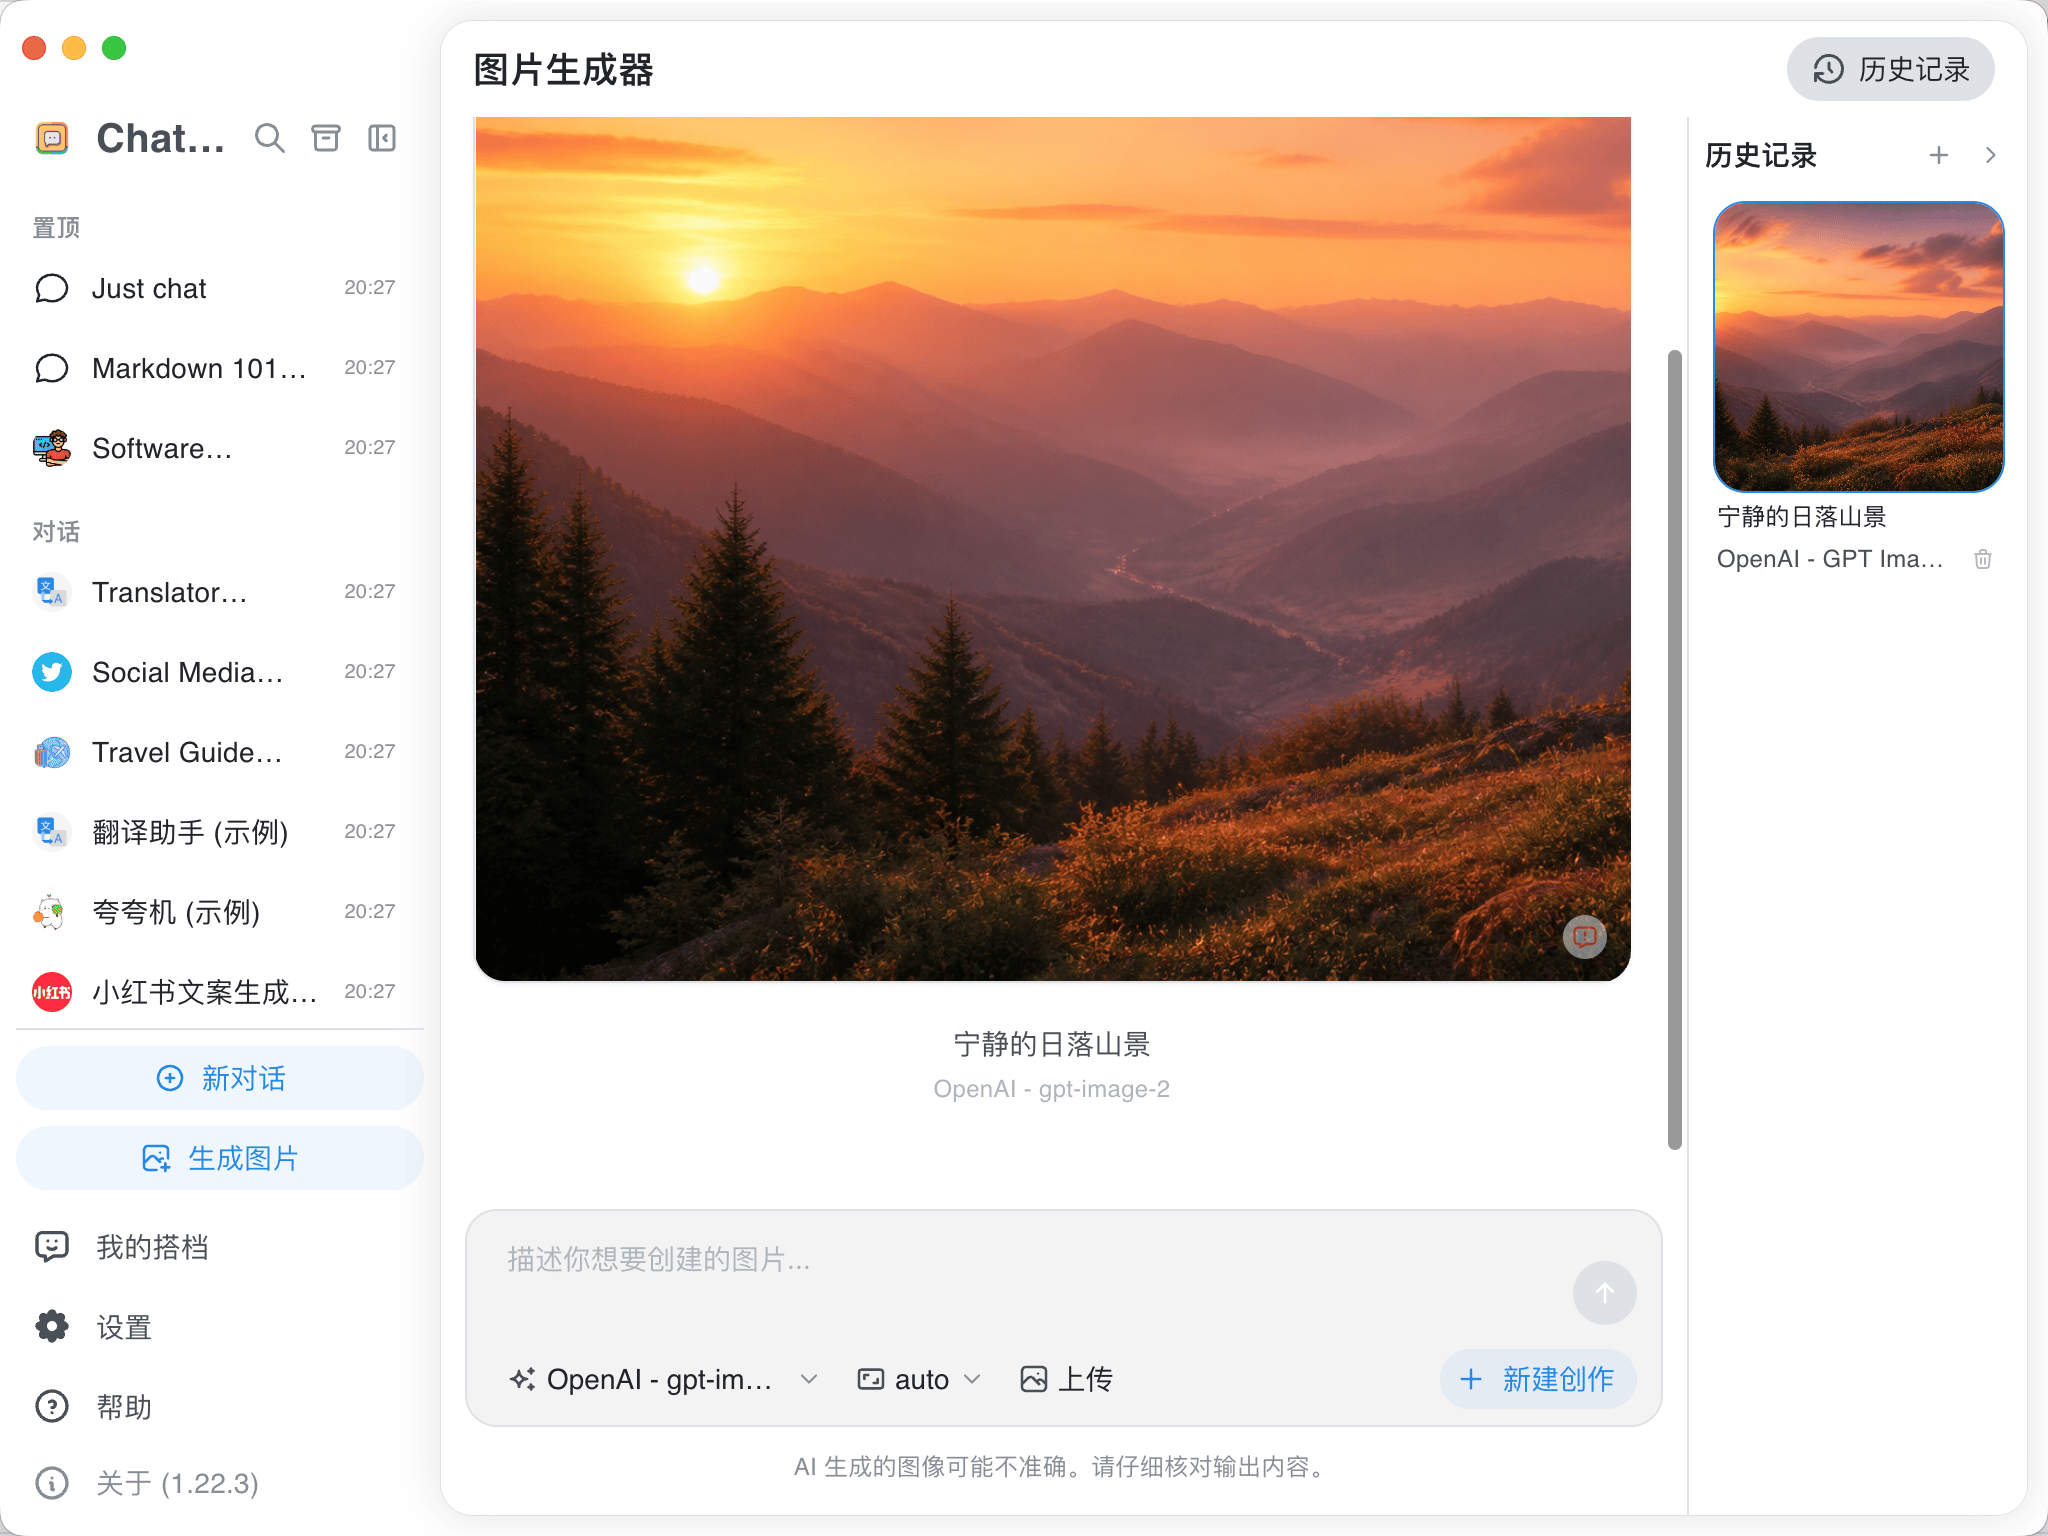
7. 配置完成后，即可输入提示词生成图片。
   <Frame>
     <img src="https://mintcdn.com/cdhyzxwl/1gnJvsU2TsZLdTQs/images/Screenshot-2026-08-15-at-20-53-00.png?fit=max&auto=format&n=1gnJvsU2TsZLdTQs&q=85&s=5228175cb6dd1fa15ccf0a6394e3631e" alt="Screenshot 2026 08 15 At 20 53 00" width="2048" height="1536" data-path="images/Screenshot-2026-08-15-at-20-53-00.png" />
   </Frame>

<Note>
  图片生成采用异步处理，所需时间会因当前服务负载和图片复杂度而有所不同，可能只需几秒，也可能需要几分钟，请耐心等待。
</Note>

如需了解 Chatbox 的更多功能和版本信息，请查看 [Chatbox GitHub Releases](https://github.com/chatboxai/chatbox/releases)。